Why You’ll Love this Vegan Protein Bars Recipe
If you’re on the hunt for a delicious and nutritious snack, you’re going to love this vegan protein bars recipe. I can’t get enough of how simple it’s to whip up these bars while keeping my diet plant-based.
They’re packed with protein and healthy fats, making them perfect for a midday boost or post-workout refuel. Plus, you can customize the flavors to suit your taste!
Whether you’re craving something chocolatey or nutty, these bars check all the boxes. Trust me, once you try them, you’ll be hooked and wonder how you ever lived without them!
Ingredients of Vegan Protein Bars
When it comes to whipping up a batch of tasty vegan protein bars, the ingredients are pretty straightforward, but they pack a powerful punch. You might be surprised to learn that you probably have some of these ingredients hanging out in your pantry right now. It’s like a little treasure hunt in your kitchen.
Plus, what’s not to love about a recipe that combines creamy peanut butter with the sweetness of maple syrup? It’s like a little hug for your taste buds. Let’s explore what you’ll need to create these delicious bars.
Ingredients:
- 3 tablespoons peanut butter
- 2 tablespoons vegan maple syrup
- 4 tablespoons dark vegan brown sugar
- 3 tablespoons ground roasted soybeans
- 12 tablespoons vegan soymilk
- 1 tablespoon cocoa powder
- 3 tablespoons flax seed meal
- 3 tablespoons oatmeal
- 1/2 teaspoon cinnamon
- 1 teaspoon vitamin powder
- 1/4 teaspoon sea salt
Now, before you start gathering your ingredients, let’s talk a bit about them. You might be wondering, can I substitute anything? Well, if you’re not a fan of peanut butter, almond butter or sunflower seed butter work just as well.
And if you’re looking to cut down on sugar, you can adjust the amount of brown sugar or use a sugar alternative. However, I’ve to tell you, the brown sugar adds a lovely caramel-like flavor that balances out the other ingredients, so tread lightly if you decide to modify.
The flax seed meal acts as a great binder, and if you don’t have it, chia seeds can be a suitable replacement. Just remember, these bars are all about finding that balance between flavor and nutrition—so feel free to experiment a little.
After all, cooking should be fun, right?
How to Make Vegan Protein Bars
Making vegan protein bars is an adventure that blends simplicity with a touch of creativity. To get started, grab a small pan and heat up 12 tablespoons of vegan soymilk, 3 tablespoons of peanut butter, 2 tablespoons of vegan maple syrup, and 4 tablespoons of dark vegan brown sugar over medium heat.
As the mixture warms up, you’ll want to stir it gently until everything is melted together and looking deliciously smooth—think of it as creating a cozy little concoction. Just don’t wander off; we don’t want a burnt pan disaster on our hands. I once turned my back for a second, and let’s just say my kitchen smelled like an unfortunate science experiment gone wrong.
Once your gooey mixture is ready, it’s time to add in the rest of the goodies. Slowly mix in 3 tablespoons of ground roasted soybeans, 1 tablespoon of cocoa powder, 3 tablespoons of flax seed meal, 3 tablespoons of oatmeal, and 1/2 teaspoon of cinnamon.
Oh, and don’t forget that 1 teaspoon of vitamin powder and 1/4 teaspoon of sea salt; they’re the unsung heroes in this recipe. Stir until everything is well combined, and the batter begins to thicken. Now, you’re ready for the next step.
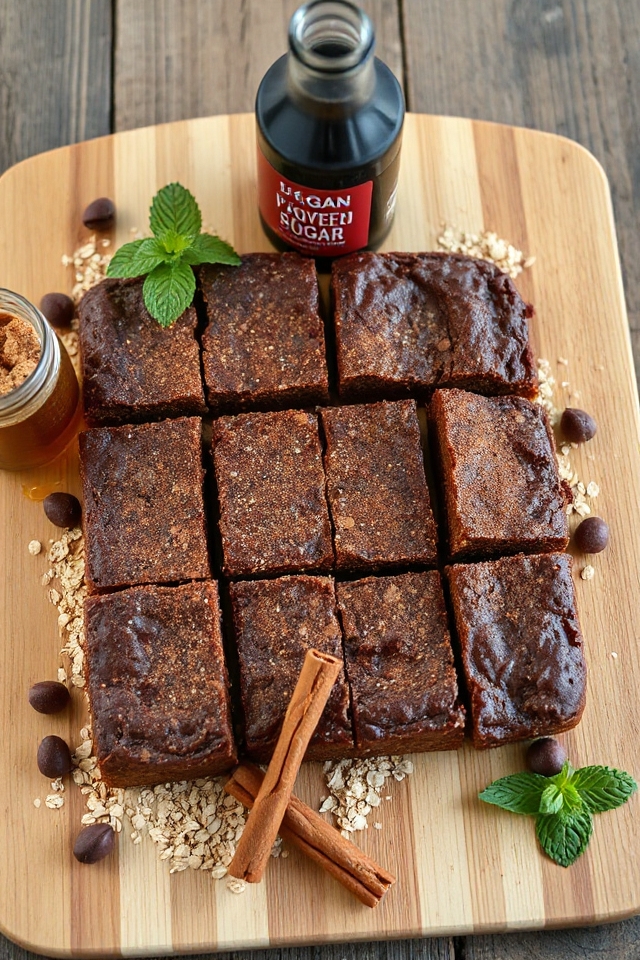
Pour the mixture into a shallow 9×6 pan lined with plastic wrap—this is key to avoiding a sticky situation later. Smooth it out with another piece of plastic wrap, pressing down gently to create an even surface.
Now comes the hard part: patience. Pop that pan into the freezer for about an hour. During this time, you could binge-watch your favorite show, or if you’re feeling ambitious, you could clean up the mess you made. I mean, who am I kidding? I usually end up with peanut butter on my nose.
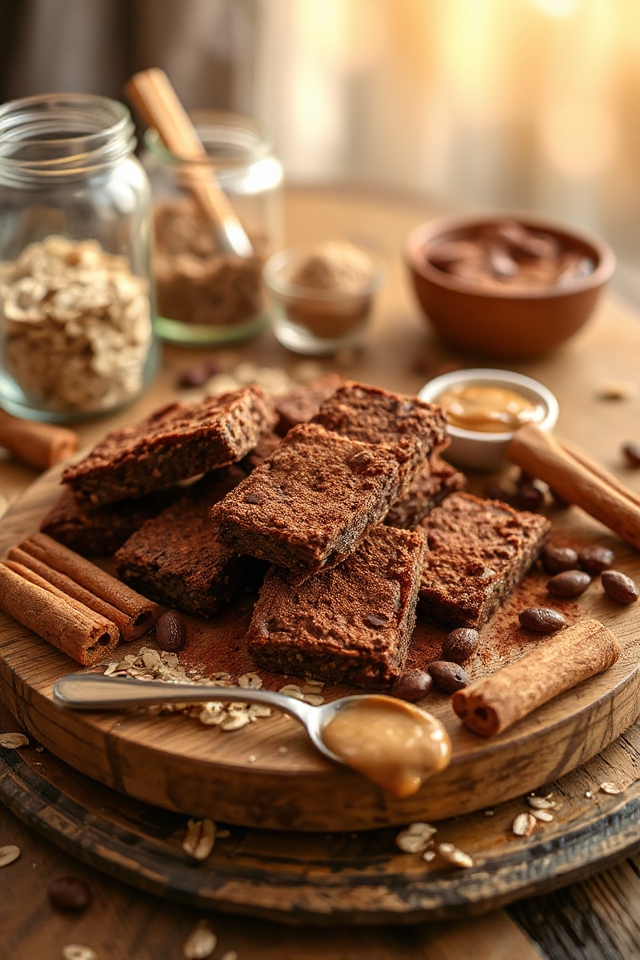
Once the hour is up, take the pan out, peel away the plastic wrap, and cut your creation into small, delightful bars. And there you have it—your very own vegan protein bars, ready to fuel your day. Enjoy them as a snack, post-workout treat, or whenever you need a little pick-me-up.
They’re not just nutritious; they’re delicious too. Happy munching!
Vegan Protein Bars Substitutions & Variations
Exploring different substitutions and variations for vegan protein bars can be a fun way to tailor the recipe to your taste and dietary needs.
For instance, if you’re not a fan of peanut butter, almond or cashew butter works beautifully. You can swap maple syrup with agave nectar or date syrup for a unique sweetness.
If you’re looking for a protein boost, try adding pea protein powder or hemp seeds. For added texture, consider mixing in dried fruits, nuts, or seeds.
Don’t forget about spices; a touch of vanilla extract or nutmeg can elevate the flavor.
Get creative and enjoy!
What to Serve with Vegan Protein Bars
After you’ve crafted your delicious vegan protein bars, thinking about what to serve alongside them can enhance your snacking experience.
I love pairing my bars with a revitalizing smoothie or a cup of herbal tea for a balanced treat. Fresh fruit, like sliced bananas or berries, adds a burst of flavor and nutrients.
If you’re in the mood for something crunchy, a handful of nuts or seeds complements the bars nicely. For a sweeter touch, drizzling a little extra maple syrup or almond butter on top brings everything together.
Enjoy experimenting with different combinations to find your perfect match!
Additional Tips & Notes
While preparing your vegan protein bars, remember that adjusting the ingredient ratios can tailor them to your taste and nutritional needs.
If you prefer a sweeter bar, add more maple syrup or brown sugar. For extra crunch, try incorporating nuts or seeds. You can also experiment with different plant-based protein powders to boost the protein content.
If you’re short on time, consider making a double batch and freezing some bars for later.
Finally, don’t forget to check the texture; if it’s too crumbly, a bit more soy milk can help bind everything together.
Enjoy your delicious creations!